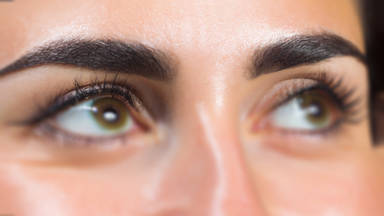
In this article, I want to tell you about eyebrow-blading or microblading, one of the latest methods for cosmetic tattoos using PhiBrows technique. We can use this technique to create thin, natural-looking lines on the eyebrows.
Microblading works best if the eyebrows have not been previously tattooed. If the brows have previously been tattooed, it is best to remove the old tattoo, match the skin color as closely as possible, and then perform microblading.
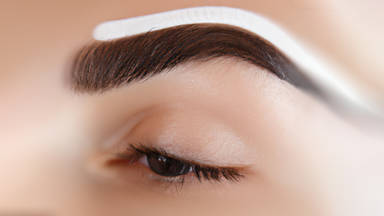
An overview of the microblading procedure
The micro-blading process begins with an eyebrow design. During design, we always strive to minimize or cover any defects. If the tail of the eyebrow is too low, we raise it to make the person look younger. We also try to control the crown of the eyebrow if it is too low, since too much pointing down can give the person a look of panic and anger.
In the operation, we lift the tail of the eyebrow a bit since it could make the person look older than they are. If the lines on the person's face point upwards, the face appears younger and healthier.
The design phase begins with a crooked detailer brush and aqua paint. Aqua paint dissolves in water, so smear the brush in water, and then start designing. Separate the eyebrows and bridge of the nose with an imaginary line. A direct line from Ala to the beginning of the eyebrows is the best way to indicate the starting point for the crown. Repeat this process for the other eyebrow. The distance between two symmetrical eyebrows must match the size of the eye.
Consider the fact that some noses have Ala with different shapes or sizes. Take this into account when designing. Next, using your brush, draw a line starting from Ala and going past the center of the eyeball and ending at the arch of the brow. Apply the same technique to the brow's outer edge. With the brush aligned with Ala and the outer edge of the eye, draw a line at the end of the brow. Repeat for the opposite brow.
Then line up the brush with the Ala and the center of the eyeball and draw a line up the arch of the eyeball, along with the outer edge of the eyebrow. This is your border guideline.
It is now time to use your brush to connect the points with lines. As previously stated, the higher the brow, the younger the person looks. Therefore, assume that the highest point in the line will tip the brow slightly upward. The lower line should be done in the same way. After this is done, connect the lower and upper lines, then try to design eyebrows that are suitable for the person's natural face, social standing, age, and most importantly, their preferences.
Work with rulers and calipers
We will now talk about using tattoo rulers and calipers. We have an imaginary line across the bridge of the nose that shows the middle of the eyebrows. The middle of the ruler should be positioned so that the middle line is directly across from the point between the two eyebrows. With the rulers, we can check if, for instance, one of the brows is lower than the other and reposition the design to make it even. We can also determine the arch of the brow from the measurements. The crowns must match. If not, move one arch to match the other. By measuring the arches, crowns, and tails with a ruler, we can make sure the size of arches, crowns, and tails are matching on both eyebrows.
Any hair outside the design must be shaved off otherwise the micro-blading results will appear thicker. The right eyebrow is usually lower than the left one in most women. When we work on the eyebrows and apply color, this difference starts to become more apparent.
Putting the design into practice
Once the design is finalized, the the lines will be drawn with a surgical pen so they do not fade away during the procedure. A few minutes later, the anesthetics will be administered, and then the microblading procedure will begin.
In order to prepare the eyebrows for this procedure, alcohol pads are applied to them and all types of oil are removed from the tissue using this pad. If a person has oily skin, skin scrubs must be used because otherwise their oily skin will reject the ink.
During this time, cover the eyebrows with a small plastic sheet. After the allotted time has passed, remove the anesthetic. Don't worry about the remaining lines from the surgical pen; these will fade as you continue to scrub the eyebrows.
In this stage, you must draw the hachure diagonally from top to bottom. Upon reaching the end of the eyebrow, you can either move the blade diagonally from top to bottom across it, or you can move the blade from bottom to top and top to bottom until you reach the end of the eyebrow, so the lines will cut each other off.
The lines you create with this technique will fade very quickly if you choose a very light brown. A very important aspect of micro-blading is covering the area with color after each series of strokes. You should repeat each line at most two or three times. Afterwards, if you still feel there are any areas to be improved, you will have to do it during the restoration process.
Whether you are drawing lines from the bottom up or the other way around, the angle of the lines increases the closer they get to the eyebrow arch. Make sure the lines are close to each other to avoid problems in the future.
You can use smaller lines to fill in the gaps between the lines. Try to draw the marginal lines first when you reach the breaking point in the middle of the brow. Every new line begins in the middle of the previous one. I'll draw the lines from the bottom up here as well. After that, fill in the brows with color and wait a couple of minutes.
Aftercare
Usually the lines start to mix after three days and some color will appear. The person might tell you that your work no longer looks the same and that the lines aren't recognizable. Before the procedure it is a good idea to let them know about this. This is normal during the first few days after the procedure. Don't forget to explain to them that they only need to use vitamin A optic ointment.
After the first three days, you might even see the lines fade but after 14 or 15 days, the colors will return and start looking normal again. After 20 to 25 days, you will see the result of your work. You can correct any shortcoming after this stage.