We are here with a tutorial on hair highlights. Applying highlights on your hair at home is not advised by professional colorists because it is a multi-step process that requires attentiveness and vigilance. It is absolutely possible for at-home highlights to go wrong, but if you follow the steps described in this article closely, everything should go smoothly.
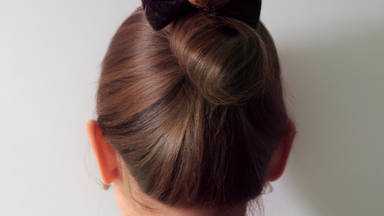
The concept of hair separation in highlights is similar to that of Ombre; we have to separate the hair from the eyebrow arch in a square shape. On both sides of the ear, separate the hair into two sections. It is also recommended to separate the hair for the back of the head into two sections, although you can do it in only one section if you prefer.
Highlights can either be linear and even so they mirror one another, or thin and erratic so they look like they're overlapping. A linear highlight is a type of highlight that is ordered and symmetrical. This symmetry and order is limited to the crown of the hair. Asymmetric or non-linear techniques are still used for the behind and on the sides of the head.
In general, the hair on the side of the ear should be divided first. Alternatively, you can start from the back, separate the hair, apply your highlight, then foil wrap the hair until it reaches the crown, then left, right, and then the crown of the hair itself. This way you will have a better visual representation of the process.
Depending on whether you want a fuller highlight, a medium highlight or a sparse highlight, you will need to separate the hair in a particular way.
For instance, to get a full highlight, meaning you want the majority of the hair to have a highlight, you separate thinner layers. Therefore, you must choose the hair you want to highlight much closer together.
Alternatively, if you want the highlight to be applied only to half of the hair, you can choose a thicker layer and select a sparse batch of hair from between the layers for the highlight.
The person's preferences are quite important. However, To move forward, we will assume the person wants a full highlight.
Let's get started
Select a thin layer of hair and separate it into several pieces. There are two sides to the foil: one shiny and one opaque. Bend the foil's tip on the inside. The hair should go on the opaque side, as the material won't slide over it. After that, bend the tip of the foil layer so that it functions as a cap and prevents leakage.
You'll need to apply a small amount of the material to the foil after it has been bent. It will make the hair adhere to the foil and you won't need to hold it up. Add the material a few centimeters below the roots. If you add it close to the top of the foil, it will leak because there will be too much product there. This is one of the most common reasons for leaks.
Hold the foil in one hand and apply the product to the hair with the other hand. If you have hair that is longer than the foil, bend your hair, place it on the foil, and apply the product. You can now apply the top of the foil with the brush since you have less product on it. However, do not apply it too close to the root, as this may cause leaks.
You can bend the foil after you have applied the material, but you should avoid bending it in the width direction, because as the number of foil wraps increases, the heat increases and could cause different levels of bleach where the foil is bent.
Next, separate the layers and make sure they are thin. As you separate the sections, ensure they are in a sensible order. It is important to apply the highlight to the frontmost layer of the hair, since people usually want to see a layer of highlight when their hair is pulled back. You will have a very neat layer of hair if you follow this advice.
The next layer of foil should be bent like the previous one, and the highlight material should be applied to the top. Pull the hair up and place the hair on the foil. As there is no material on this part, we do not have to worry about leakage.
Apply the material a few centimeters below the edge of the foil. It will make your work easier later on when you want to check for bleach level if you apply the product evenly across the hair.
After you've added the product to the lower parts of the hair, pick up a bit of the material and add it to the top as well. Place a layer of cotton under the foil on the side of the head, then wrap it in cotton and bend it as you did before.
It is crucial to consider the person's preference when doing a linear and symmetric highlight. Therefore, if someone says they don't want highlights on the middle of their bangs, you need to separate a thin layer on the front and leave it alone without a foil wrap.
Divide the crown area of the hair into linear layers. Here, you don't pick hair from individual layers, you just wrap the whole layer in foil. You can highlight both sides in a symmetrical manner later on after your dye if you split the section at the front. Similarly, if someone wants a highlight starting from the first layer, you can do the same thing for this layer as well.
For this article, we suppose the person doesn't want the hair on this layer to have a highlight. Make sure this layer is very thin. Bring your foil and add some material to it, then put the hair on it. Ensure the hair sticks to the foil.
Since the material will not be added to the top of the foil, no leakage will occur. Now that the hair is attached to the foil, you can start adding the material. Bend the foil and add a layer of cotton under it if needed and then add the next layer.
Continue wrapping the next layer in foil until you reach the crown, separating your next layer and making sure they are the same size and order.
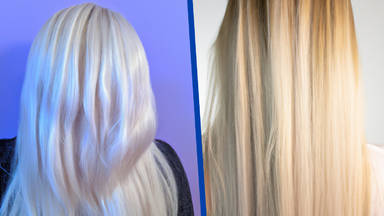
You should wrap the back of the head as well, and then check your foil wraps. When you check, be sure not to move the foils or cotton pieces to prevent leaks. Once you reach the bleach level, rinse the hair and prepare it for dyeing.
You have now finished the process of applying highlights to your hair. I hope this tutorial has been helpful to you.