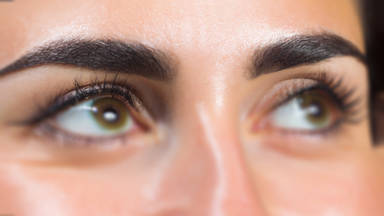
Phibrows Microblading is a semi-permanent tattoo applied at the bottom of the first layer of skin which can last up to several years, depending on the type of skin and lifestyle. It's most effective on normal to dry skin. You will find many important and useful tips in this article as we walk you through the process of applying a phibrow microblading tattoo.
To begin with, you need to use an anesthetic to numb the treatment area. After that, you should consult with the individual to learn how they would like their brows designed, and then you can start to map out the brow design.
In mapping out, you need to identify the symmetry point which is usually found right above the nose bone. If you draw a straight line from the nose bone to the end of the eyebrows, you will be able to map this symmetry. You will require all symmetry to be based on this line in the middle of your forehead, so it is very important to pay attention to this step. In order to do this more precisely, you have the option of using various helper tools and techniques.
The following are a few tips to remember when designing your brows. In order to have wide brows, you should extend the bottom or top of the brows. For those whose brows are closest to the eyes, it's best to extend it from the top. Then, determine the brow arch based on the face shape of the person.
The next step is to check your work for symmetry after you have mapped out your eyebrow design. This can be accomplished using a mobile app such as Brow Symmetry, which is available for iPhones and Android phones. It uses standard lines to help determine whether the six golden points on the brows are perfectly symmetrical.
By doing so, you will be able to analyze if your designed eyebrows are 100% symmetrical, so you can proceed with the treatment.
As soon as the mapping process is complete, the pigmentation process begins. Every pigmentation needle type requires its own method of drawing the strokes. For instance, when using a slope needle, the technique is different from the method used for U needles.
Starting from the crown point, you can draw strokes. It is important to apply PhiBrows stages sequentially. The skin needs to be stretched with two fingers of the free hand while the bottom of the brow needs to be stretched with the first finger of the other hand in order to implant the pigments properly. Neither the needle tip nor the skin should move while the needle is being inserted. The results will be poor if the skin moves up and down.
Likewise, keep in mind that all strokes should be drown downward from the top. Never move the needle from the bottom to the top while doing the last 2/3 of the brow length. On the crown area, however, you should do the opposite and move from the bottom to the top because if the color started from the top, it would eventually spread under the skin.
The tips listed here will contribute to the longevity of your work and the prevention of color spreading under the skin. Some of the aforementioned tips might be overlooked by some technicians, but each and every one of them can have an important impact on the outcome.
The appearance of the eyebrows can be ruined by deep cuts, bleeding during the procedure, moving the needle incorrectly, and overrepeating strokes. I suggest removing the excess color off of the skin after each stroke if you are a beginner without much experience, so that the design tracks won't be ruined. In this way you will be able to avoid crossing the design outlines of your brows, but as you gain experience, you can leave the excess color on the skin for better absorption.
You should never apply each stroke to one brow before applying the next one. Once you have completed the main strokes on one eyebrow, you should apply each step on the other eyebrow. The steps for both brows must be completed at the same time. You should never finish apply the design on one brow before applying it to the next one.
After implanting the strokes, it's time to stabilize the color on the brow. The micro-brush is used in this step to fix the color on the eyebrow by covering the entire area with extra color. This is also the point where you should re-establish the anesthetic effect in order to continue with treatment. Anesthesia is required at each step. It actually works better at each step with a particular anesthetic.
Once the anesthetic has been applied to the area, you can cover it with a plastic cover for 10 minutes, and work on the other brow while it is on.
In order to finish the pigmentation, you need to repeat drawing strokes after you have completed the main strokes on both brows and have applied the color mask. After each brow received ten minutes of color mask treatment, you can peel off the cover and remove the mask, then draw on the previous strokes. This step must be repeated for each stroke. To appear neatly blended with the natural brow, the strokes need to be delicately placed one after another, matching each other perfectly.

