Today, I'm going to show you how to do a light bridal makeup. Would you consider ditching your winged liner in favor of something softer and smokier? Should you use airbrush foundation when designing your natural wedding makeup? On this tutorial, you will learn how to look put together and still be naturally gorgeous.
The foundation is a key aspect of light make-up that contributes significantly to the overall look of the face. Therefore, apply a primer as the foundation first. If the skin has tiny open pores, the primer can be used to close them. It is important to note that there are different kinds of primers for different types of skin that are useful in preparing the skin by restoring it to a normal condition.
A contour can be done various ways. Either start with a foundation or go straight to the contour without a foundation. The technique we are going to apply involves making a foundation base on which to build the contour. For the foundation, make it the same color as your skin or a few shades lighter. A lighter shade will enhance a bride's look and make her face more radiant. However, it is not recommended that you go much lighter than the skin tone because it will appear unnatural.
It is also important to choose the right kind of material to use as the foundation. It should be a material which is durable enough to last the rest of the makeup treatments. It is typical for brides to keep their makeup on until late at night.
After you apply the cream, rub a pad across the face. Make sure the pad is damp, so the cream absorbs better. If you feel that the skin is not even in color all over the face after rubbing the pad thoroughly on it, you can add a layer of cream powder to make it even. As you apply the cream, apply it as thinly as possible. If there are any tiny freckles on your skin, you will need to apply one more layer of cream powder to conceal them.
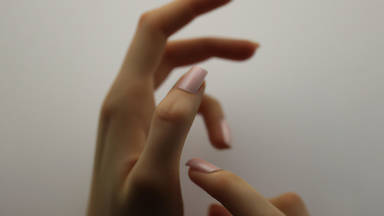
Having thoroughly covered the face with cream powder, it's time to apply the eye cream around the eyes as concealer. Apply the cream with the index finger completely around the eyes and even into the eyebrows. It might look unappealing at first, but it will prepare the eyebrows to receive brow designs later.
Apply the fixing powder next and the dry contour afterward. Place a hand towel near your neck in order not to spill the powder on your clothes while applying it. By swiping the brush in a tapping motion, start by throwing a little powder onto the face, then add more by tapping the brush again.
To apply powder to the edges and underneath the eyes, use a smaller brush and spread it back and forth. Also apply it to the corners of the nose and lips. Darker areas on the face should not be overlooked, including chin, cheekbones, inner corner of the eyes, and underneath the hairline on the forehead. You should always darken the neck a little so that it won't stand out too much from other parts of the face.
Now that you've added dark shades, it's time to add lighter contours.
In light contouring, you should cover the untouched areas around the eyes, the center of the forehead, the nose bone, and the top of the chin. The light areas are meant to be more visible so as to add more contrast between the dark and light areas.
Next, you'll need an eye shadow in a reddish-pink or light brown shade, so you'll need a makeup palette for this makeup. Apply the TEDDY Pink shade from the palette to the outer corner of your eye. Then, apply the BARE colour shadow to the inner corner of the eyes, as well as under both eyes. After that, fade the color on the back of the lid, underneath the brows, in the tops of the cheekbones, and on the nose bone.
Use a white color to lighten the inside of the lower lids. Use a pen containing a little fat, which helps the whiteness stay a bit longer inside the eyes as there is moisture within the eyes, so use a material that can pass through them.
The bride's eyes will look incredibly attractive with the glitter applied to the back of her lids after she has made the inner portions white. When applying light makeup, we usually define the eyes with contouring; you may also use an eye liner for that purpose.
You can draw the eye line along the base of the lashes, or you can cover the entire length. There are a number of ways to draw the eye line depending on the shape of the eyes.
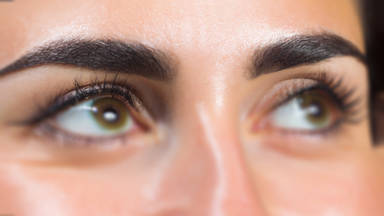
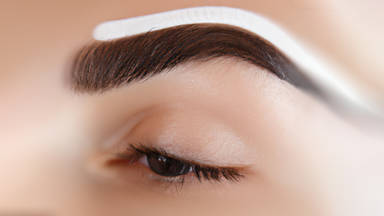
The brow mascara is applied after the eye liner has been applied. It is either done by hachuring alone or by hachuring along with shadows. This too depends on what type of makeup we want; various eyebrow designs are available for both dark and light shadows. However, for light makeup, the brows should also be light, so we should apply shadows to the areas around the tail, and complete the rest of the make-up with hachures.
Do the brow hachure.
You should draw as tiny strokes as possible to retain the delicate appearance of the eyebrow. Fill in the crown part that has less hair than the rest. Use only individual single lashes for false eyelashes. After applying the false lashes, apply mascara and join your natural lashes to the false lashes using the mascara brush. You should also apply mascara to the lower lashes. On the lower lid, where there are only natural lashes, mascara is applied differently from its application on the top lashes. First with the tip, then with the bristles.
Apply a pink blush to the round parts of your cheeks once you have contoured them. This puts a light pink effect on the previously contoured areas of your face.
This makeup can be done with any color highlight, but pink is the most popular choice. You can now finish your makeup process if you wish to have light makeup. However, if you want to add more highlights to your face, you can apply some pink blush to the top of cheek bones, above the lips, and above the chin.