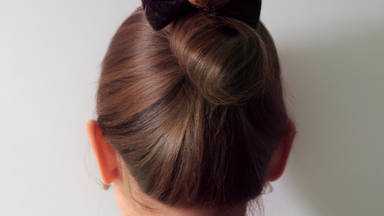
For a girl's daily look, an easy-to-manage yet very pretty hairstyle is ideal. It doesn't have to be overly complicated to be an elegant chignon. Whether your hair is long, medium, or short, here is an easy yet gorgeous style you can try.
Hair separation
Starting with the side of the ear, let's separate the hair with regard to our chignon design. Let's separate the hair in a flow from one ear to the other. Afterwards, separate the top of the hair in a straight line and hold this section of hair in hand.
Because we will wrap the hairpin around the back of the head later on, let's tease this section first to make the basis for the chignon, and then move on to the rest of the work. The layers should be chosen directly above the root, and for a proper teasing, the brush should be moved up four or five centimeters and brushed down to the root.
Pull out the brush and repeat the process once you have reached the root. You’ll notice the hair will rise horizontally if you teasing is done correctly, but it will fall flat in case of incorrect teasing. Apply the styling spray layer by layer and tease. For the last layer, tease the surface of the hair rather than the back. This means that the brush will work on the top side of the layer.
Brush the surface of the hair without going too deeply. Pull the layers back together and widen them a bit while brushing. Using your hand, hold the hair down and add a hairpin in the middle. Now, add another hairpin in the opposite direction to prevent it from getting loose. For now, let the sides remain and use the pins only in the middle.
The crown of the hair
For the front section, you should use the palm of your hand to measure the hair and work forwards from there. This is the crown section of the hair and it should be split in a straight line.
If you are an amateur, you can use volume powders, otherwise stick to teasing natural hair. First brush your hair, then separate the layers in straight lines, and begin teasing.
Continue by separating another layer in a straight line, holding the hair up, and teasing it from five centimeters above the root. Bring the layers down and widen them as you do so.
The way in which you brush the hair is very important at this point in your work. Don't brush the hair back; instead, brush the hair up so the hair doesn't lose its puffiness. You should brush the crown and spray the hair against the grain. Then brush again and if you see any teased hair on the surface, fix it using the brush tip. Once the hair is straight, hold it in your hand and spray some styling spray on it.
Prepare a prosthetic or silicon piece and attach it to the area where you previously attached the hairpins. The size of the prosthetic is dependent on your preference. A bigger prosthetic will result in a bigger bun while when you add the prosthetic on a lower position on the hair, it will lower the chignon. You can fix it in place with a hairpin. Attach the hairpins in the same direction as the original hairpins under the prosthetic.
Once the prosthetic is in place, spray some hairspray on the hair, brush the hair to ensure there are no tangles, and pick a layer from the middle of the hair. Brush the hair and tease the surface gently, then put the hair up. Brush the surface of the hair but avoid brushing too deeply. Place the hair on top of the prosthesis, widen it, and apply a styling spray.
As you work on the hair behind the ears, brush the surface gently, widen it, and pull it over the prosthetics. Leave the hair on the sides of the ears free for now. Brush the hair from the root, even it out with the portion from the middle, using the tip of the brush. Styling spray should be applied to the hair after it is held with a hairpin.
The remaining hair can either be placed below the prosthetic or it can be added to the hair on the other side and placed above it. Repeat the process on the other side as well.
Then gather the hair completely and place a hairpin to keep the hair in place. Keep the remaining hair and apply some hair cream to it before placing it behind the layer on the opposite side. You can use a hairpin now to make it secure.
In case you see any uneven spot in your hair, you can use the tip of your brush to bring it out or to fix it. After that, apply some styling spray to make the surface more smooth, remove the hairpins and reapply styling spray.
The front side of the hair
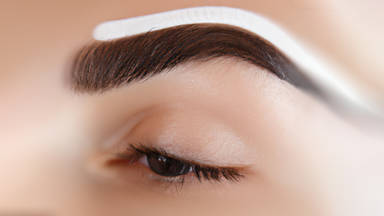
Begin at the side of the forehead. For the split section, begin at the arch of the eyebrow in a straight line. The split section can be done in zigzags if you'd like to spice it up. Make sure the hair is tangle-free before splitting it into two sections. Make sure your hair is held up and teased from the back. Spread your hair a bit towards your face.
You should stick the other side of the layer to the crown of the hair. Twist it slightly, fix it with a hairpin, and start creating delicate lines across the hair from the root. We recommend drying and securing the hair with styling spray, before moving on to the next step.
You need to stick the side to the crown hairs. Spread the hair out a little bit, and use a hairpin to hold the hair in place. Then, create delicate lines on the hair, dry it and add some hair cream to the rest of the hair and place it under the prosthetic. Attach a hairpin to prevent the hair from moving away.
Braid your bangs
Putting a braid on the bangs will make it look much better. Let's let a little hair hang down to make it look more natural. Divide each split with zigzag movements so the scalp is hidden. Brush the hair on top with some hair cream.
You'll see that after separating the different parts of the hair in this manner, the top will have an angle to it. Pick out a layer of hair in the shape of a triangle. Hold this layer of hair in your hands and separate it into three parts. The end of the last section covers the middle section, the end of the section on the other end also covers the middle, and then the first step is repeated.
Add another layer to the close layer, and continue adding layers diagonally, not in straight lines. With each step, add a layer of hair from either side of the head. Holding the hair, separate the next layer and bring it to the middle, using hair cream to make the work easier.
Make sure you do not include the bangs in the braid. Pick another layer diagonally and add to your braid. Continue holding the hair, separating the next layer, then bringing it to the middle. Once the braid is finished, pull the layers to loosen them slightly and use hairpins to keep it in place. Under your coup in the back, wrap the end of the braid, and cover it with your braid.
Final touches
In closing, you can smooth the surface with a styling spray. Once the styling spray is dry, secure the hair with a few hairpins and fix it on the prosthetic.